

The Art of Capturing Frozen Beauty
Filming ice is one of the most rewarding yet challenging tasks for a cinematographer. Whether you are working on a commercial for a refreshing beverage brand in Mumbai or shooting a documentary in the cold reaches of Himachal Pradesh, ice offers a visual complexity that few other subjects can match. It is transparent, reflective, and ephemeral. In the Indian climate, where temperatures can soar, filming ice becomes a race against time and physics. This guide will walk you through everything you need to know about how to film ice effectively, covering everything from preparation to post-production.
Why Ice is a Unique Challenge
Ice is not just a solid block of frozen water; it is a prism. It bends light, reflects its surroundings, and changes its state constantly. For a filmmaker, this means you are dealing with a subject that lacks a fixed appearance. The way ice looks depends entirely on the lighting, the background, and the temperature of your environment. In India, the humidity and heat add another layer of difficulty. Condensation can quickly cloud your glass, and your subject might disappear before you have even finished setting up your focus pull. Understanding these properties is the first step toward mastering the craft of ice cinematography.
Preparation and Sourcing Your Ice
Before you even touch your camera, you need to decide what kind of ice you are filming. Not all ice is created equal, and the type you choose will define the look of your final footage.
Clear Ice vs. Cloudy Ice
Standard ice cubes from a home refrigerator usually appear cloudy in the center. This is caused by trapped air bubbles and impurities. While this might look natural for a casual scene, professional product shots often require crystal-clear ice. To achieve this, you can use the directional freezing method. By placing a small cooler inside a larger freezer with the lid off, the water freezes from the top down, pushing air and impurities to the bottom. You can then cut away the clear top portion. If you are on a tight schedule in a city like Delhi or Bangalore, many specialty vendors and high-end bars can provide clear ice blocks specifically for filming.
The Role of Acrylic Ice
In many professional food and beverage commercials in India, filmmakers use acrylic or fake ice. This is because real ice melts under hot studio lights. Acrylic ice looks remarkably realistic and stays the same throughout the entire shoot. However, it does not float like real ice. If you are filming a drink where the ice needs to bob on the surface, you will need to use real ice or a combination of both. For macro shots where you want to see the melting process or the way light interacts with natural cracks, real ice is irreplaceable.
The Best Camera Gear for Filming Ice
Your choice of equipment will determine how much detail you can extract from the frozen textures.
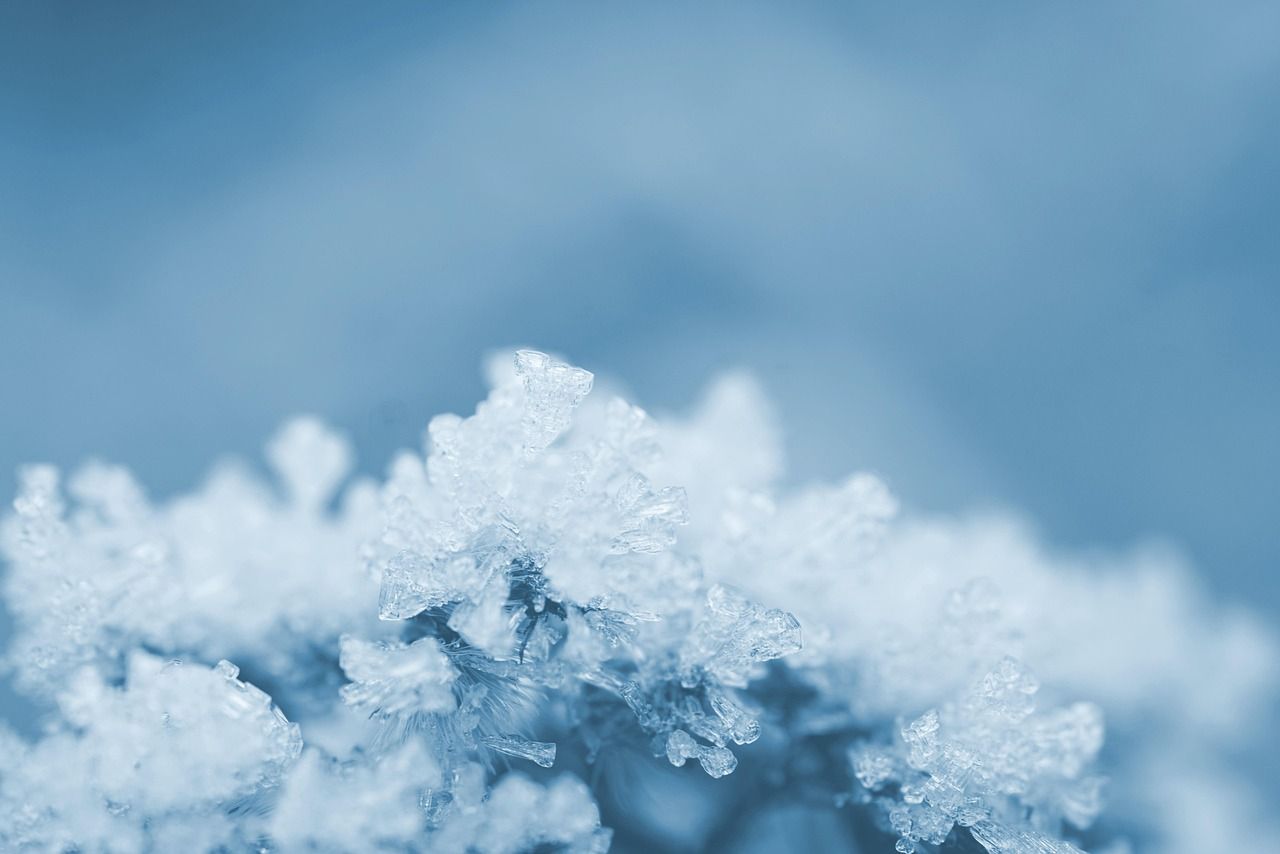
Macro Lenses are Essential
To truly capture the beauty of ice, you need to get close. A macro lens, such as a 100mm or a 90mm, is ideal. It allows you to see the tiny air bubbles, the crystalline structures, and the way water droplets move across the surface. When filming for high-quality projects, these details provide the organic texture that audiences find appealing. If you are on a budget, even a set of macro extension tubes can help you get closer to the subject without a heavy investment.
Stability and Tripods
Filming ice requires precision. Because you are often working with macro shots, the slightest vibration can ruin the frame. A sturdy tripod is mandatory. If you are performing a slow focus pull to reveal the interior of an ice block, any shake will be magnified. Use a fluid head for smooth pans or tilts if you are tracking a melting droplet.
High Frame Rates
Ice looks spectacular in slow motion. When a piece of ice drops into a glass of soda, the splash and the subsequent movement of the ice are too fast for the human eye to fully appreciate. Filming at 60fps, 120fps, or even higher allows you to stretch time and show the elegance of the movement. This is a staple technique in Indian beverage advertisements to make the product look more refreshing.
Lighting Techniques for Ice
Lighting is the most critical factor when learning how to film ice. Because ice is transparent, you cannot light it from the front like a solid object. Front lighting will only create harsh reflections on the surface and make the ice look flat and dull.
Backlighting: The Secret Sauce
To make ice glow, you must light it from behind or from the side. Placing a light source behind the ice allows the light to pass through the frozen structure, highlighting the internal details and edges. If you are filming a glass of water with ice, placing a small LED panel or a bounce card behind the glass will create a beautiful rim light that defines the shape of the ice cubes.
Using Diffusers and Bounce Cards
Hard lights create harsh, distracting highlights on the wet surface of the ice. Use softboxes or diffusion sheets to spread the light evenly. In Indian studios where space might be limited, simple white foam boards can act as excellent reflectors to fill in shadows without adding unnecessary heat to the set. Using a black background can also help the translucent ice stand out, making it look premium and clean.
Controlling Reflections
Ice is essentially a series of mirrors. If your studio is messy, you will see it reflected in the ice. Use black drapes to cover anything that shouldn't be visible. A circular polarizer filter on your lens is also a great tool; it allows you to control and reduce unwanted glares on the surface of the ice or the glass container.
Managing the Indian Climate and Melting
Filming ice in India presents the unique challenge of heat. Whether you are in Chennai’s humidity or the dry heat of Rajasthan, ice will melt faster than you expect. Here is how to manage it.
Keep the Environment Cold
If possible, blast the air conditioning in your studio for at least an hour before you start filming. A cold room slows down the melting process. If you are filming on location, keep your ice in a high-quality insulated flask or cooler until the very moment the camera is ready to roll.
The Glycerine Trick
If you want the look of condensation on a glass without the mess of actual melting, use a mixture of water and glycerine in a spray bottle. Glycerine doesn't evaporate as quickly as water, so the droplets will stay in place for a long time under hot lights. This allows you to focus on your camera settings without worrying about the glass looking dry.
Handling Condensation
Sometimes, the glass becomes too foggy, hiding the ice inside. Keep a microfiber cloth and some glass cleaner nearby. For a more permanent solution, some filmmakers use a thin layer of anti-fog spray on the outside of the glass, though this should be tested beforehand to ensure it doesn't affect the visual clarity.
Creative Ideas for Filming Ice
Once you have mastered the technical side, you can experiment with creative concepts to make your footage stand out.
The Melting Timelapse
Set your camera to take a frame every few seconds as a block of ice melts. This creates a mesmerizing effect where the ice appears to shrink and turn into a puddle in seconds. This is great for storytelling, perhaps symbolizing the passage of time or the impact of heat.
Freezing Objects Inside
For a visually stunning shot, freeze objects like flowers, fruits, or even tech gadgets inside a block of clear ice. As the ice melts or as you light it from different angles, the object inside is slowly revealed. This adds a layer of mystery and color to your shots.
Coloring the Ice
Who says ice has to be clear? Adding food coloring to the water before freezing can create vibrant, abstract visuals. When these colored blocks melt and mix, the resulting footage can be used for artistic transitions or experimental films.
Conclusion
Learning how to film ice is a journey of trial and error. It requires patience, a keen eye for lighting, and a few practical tricks to beat the heat. By focusing on backlighting, using macro lenses, and carefully managing your environment, you can capture stunning, high-quality footage that elevates your cinematography. Whether you are working on a professional commercial or a personal project, the tips outlined in this guide will help you showcase the frozen world in all its glory. Remember, the beauty of ice lies in its imperfections and the way it interacts with light, so do not be afraid to experiment and find your own unique style.
How do I make ice look clear for a video?
To get clear ice, use the directional freezing method by using an insulated cooler inside a freezer. This forces air bubbles to one side, leaving you with a crystal-clear block that looks professional on camera.
What is the best lighting setup for filming ice?
Backlighting is the most effective setup. Position your light source behind the ice to highlight its internal structure and edges. Side lighting can also be used to add texture and depth.
How can I stop ice from melting too fast in the Indian heat?
Pre-cool your studio with air conditioning and keep the ice in an insulated container until the moment you shoot. You can also use acrylic ice for non-floating shots to avoid melting entirely.
Should I use real ice or fake ice for beverage commercials?
It depends on the shot. Use fake acrylic ice for long setups where consistency is needed. Use real ice if you need the ice to float or if the scene involves the ice melting naturally.
What camera settings are best for ice splashes?
Use a high frame rate, such as 120fps or higher, and a fast shutter speed to freeze the motion of the water and ice. This creates a crisp, slow-motion effect that looks very appealing.
